Like everyone I am busy, busy, busy these days. I am not as good a blogger as most, but I am trying to post more often but don't always have a project finished. That is why I thought maybe I would post a half finished project. I have had this French chair in my garage for at least three years awaiting her turn to be made over. Unfortunately the person I bought her from had already removed the fabric so I won't have a pattern. I think I will be able to figure it out though with the help of some great blogs out there.
Pretty huh?
This is one very old chair, no staples anywhere, only tacks. Even though at first glance you may have thought she was ready for sanding and painting. NO not so. Two hours and some very sore fingers later, the tacks were out!
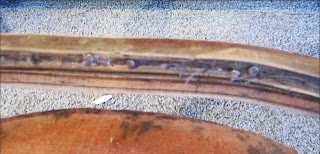
Here are a few of the many tacks I pulled. They were so old and rusty some of them came apart and I couldn't totally remove them.
Already looking better after a good coat of DIY off white chalk paint.
And a coat of DIY teal chalk paint.
Some dry brushing of off white.
And a bit of distressing.
Next up antiquing and recovering. But she already looks so much better. Not sure if I am going to rip off the ugly covering there or just cover it up with more padding and some muslin before I put on her pretty dress. What do you think?


Beautiful chair, I love the paint choice! Can't wait to see the fabric you have planned. Found you on MMS, Furniture Friday. MMS has a wonderful french chair tutorial! I have completed 15+ chairs since watching her work. Wishing you the best!
ReplyDeleteYes MMS is the best.
DeleteGreat Start to your chair! I'd take the cloth cover off carefully and use it as a pattern to cut the new cover. First of all, the fabric looks stained and might be smellish. Secondly, you might find that you should replace the padding if it's worn to make the chair more comfortable.
ReplyDeleteYes I agree after much thought I need to replace all the yucky and have new. After pulling it all off there was more yucky underneath so so glad I did. I will have the finished chair posted soon.
DeleteVikki,
ReplyDeleteI think it's already a vast improvement and hope you show the finished project. I looked at some past posts and am in awe of your talent and creativity. I adore the little "Prince" chair you made!
Deborah
Thanks so much for the kind words. That means the world to me.
DeleteI have always wanted to try this! What a pretty chair. Thanks for your visit, I look forward to following your progress!
ReplyDeleteCheers, Andrea
Thanks Andrea, I am hoping to finish it soon.
DeleteI bought the same chair to recover. I can't wait to see your next step so I will have an idea of what to do with mine.
ReplyDeleteThanks, I will be on it soon.
Delete